Manage applicants
This page shows you how to email applicants in bulk: to tell the ones you're interested in that they're moving to the next stage, and to close the loop with the ones who weren't chosen. It also shows how to open their résumés.
Members with the Manage Job Applications permission.
Applicant statuses
Each application is either active or Rejected. There are no other statuses, such as "Interviewing" or "Hired". Rejected applicants are marked Rejected in the list and in their application.
Applicants you've moved forward are marked Moved forward. That's a marker, not a status: they're still active, you can move them forward again, and you can still reject them. If you reject someone you moved forward, the list shows Rejected, and their application shows both dates.
Move applicants forward
Moving applicants forward sends each of them an email, such as an invitation to interview, and keeps them in your applicant list.
- Go to Widgets > Careers and select the job.
- In the applications list, tick the applicants to move forward. Select all … eligible works here too.
- Click Move forward.
- Choose the Email template. The list shows every move-forward email your organization offers. See The move-forward email. Click Preview email to see it filled in for the first applicant you selected.
- When moving more than 25 applicants forward, tick "I understand this will email … applicants."
- Click Email … with the number of applicants.
You see a summary, such as "12 applicants moved forward — 12 emails sent". The applicants are marked Moved forward, and their application shows when, and who moved them forward.
If some of the applicants you selected were moved forward before, the dialog says so, for example "3 of these were already moved forward." You can still send: a second or third round is normal. Applicants who've been rejected, and applicants without a valid email address, are skipped.
Replies to a move-forward email go to the email address of the member who sent it.
Move-forward emails are sent straight away. Check your selection and the email template before you confirm.
You can move up to 300 applicants forward at a time.
Reject applicants
- Go to Widgets > Careers and select the job.
- In the applications list, tick the applicants to reject. To tick everyone on the page, use the checkbox at the top of the list. To select every eligible applicant for the job, click Select all … eligible. Rejected applicants can't be selected again.
- Click Reject applicants.
- Choose whether to Send rejection emails. Turn it off to update their status without telling them.
- If you're sending emails, choose the Email template. The list shows every rejection email your organization offers. See The rejection email. Click Preview email to see it filled in for the first applicant you selected.
- Optionally, add an Internal note (optional). Applicants never see it. It's shown on the application as the Rejection note.
- When rejecting more than 25 applicants, tick "I understand this will reject … applicants".
- Click Reject … with the number of applicants.
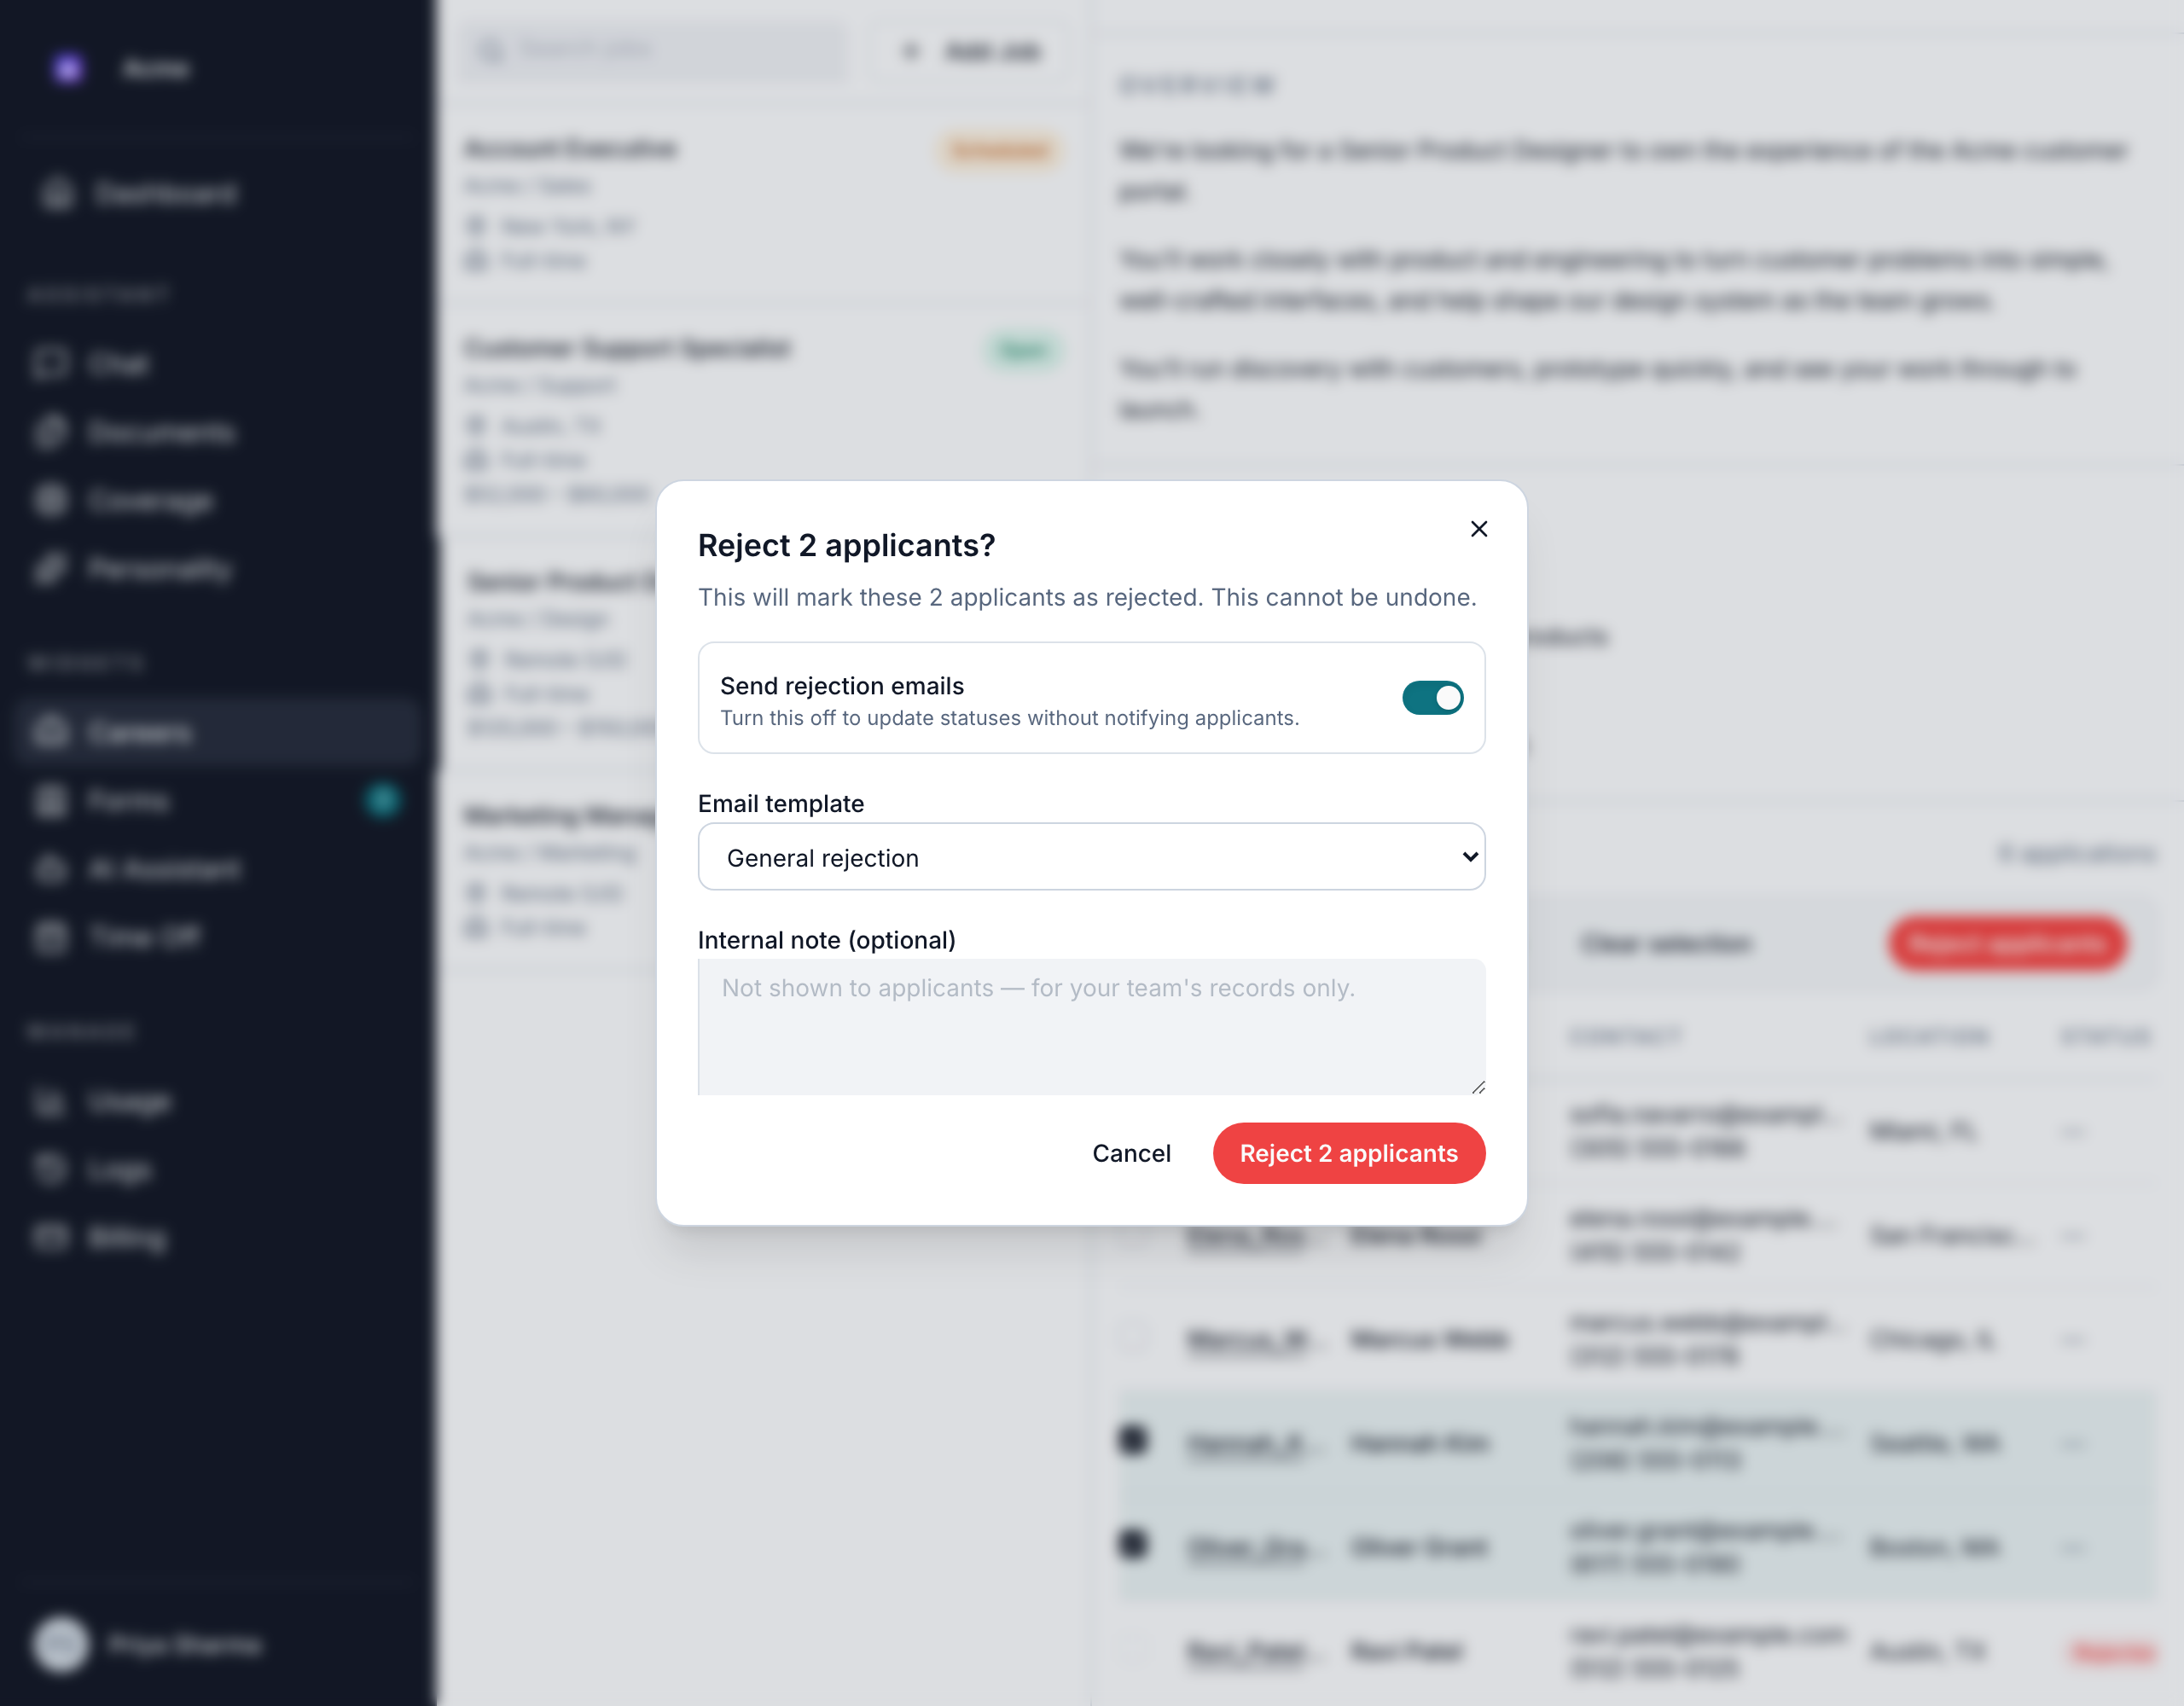
You see a summary, such as "12 applicants rejected — 12 emails sent". Applicants who were already rejected are skipped.
Rejecting can't be undone, and rejection emails are sent straight away. Check your selection and the email template before you confirm.
You can reject up to 300 applicants at a time. If more match, you see "Too many applicants match this job (300+). Narrow your selection or work in multiple passes."
The rejection email
Rejection emails are shared by every job posting in your organization. To manage them, click the Applicant emails button (the envelope) at the top of the jobs list in Widgets > Careers and open the Rejection tab, or click Manage templates in the Reject applicants dialog.
Bizbot comes with 3 emails. Their subject is "Update on your application to …", with your organization's name:
- General rejection: "After reviewing your application, we've decided not to move forward at this time."
- Rejected after interview: thanks them for interviewing, and says you've chosen another candidate.
- Position filled: says the position has been filled.
On the Rejection tab you can:
- Edit a built-in email. Your text replaces the built-in text for your organization, and the email is marked Customized. To go back, click its reset button and Reset to default.
- Hide a built-in email. Turn off Shown. It stays in the list, marked Hidden, but isn't offered when rejecting.
- Add your own. Click New template, and enter a Name, Subject and Body. Turn it off to stop offering it (it's marked Archived), or delete it.
Editing, hiding and adding rejection emails is included in the Business and Enterprise plans. On the Free plan, the Rejection tab lists the 3 built-in emails as they come, read-only, and those are the emails you can send. Your customized and own emails are kept, and come back if you upgrade. See Plan features.
Use these placeholders in the subject and body. They're filled in for each applicant, and the editor shows a preview:
| Placeholder | Replaced with |
|---|---|
{{first_name}} | The applicant's first name, or "there" when it isn't known |
{{full_name}} | The applicant's full name |
{{job_title}} | The title of the job they applied for |
{{organization_name}} | Your organization's name |
{{recruiter_name}} | The name of the person sending the email, or "The Hiring Team" when it isn't known |
Changes don't affect emails that are already queued or sent. Creating, editing, resetting and deleting rejection emails is recorded in the action log.
If every rejection email is hidden or archived, you can still reject applicants, but you can't send emails until you turn one back on.
The move-forward email
Move-forward emails are managed the same way as rejection emails, on the Move forward tab of Applicant emails. Manage templates in the dialog that Move forward opens takes you to that tab.
Bizbot comes with 2 emails. Their subject is "Next steps for your application to …", with your organization's name:
- Moving forward: says you'd like to move them to the next stage, and that you'll be in touch with the details.
- Interview invitation: invites them to an interview, and asks them to reply with a few days and times that work.
You can edit, hide, reset and add move-forward emails exactly as described for rejection emails, with the same placeholders and the same plans. The two lists are separate: a move-forward email is never offered when rejecting, and a rejection email is never offered when moving applicants forward.
If every move-forward email is hidden or archived, you can't move applicants forward until you turn one back on.
If applicant emails fail
If some emails couldn't be sent, the summary says how many failed, such as "3 failed". The applicants are still rejected or moved forward.
To send the failed emails again:
- Select the job in Widgets > Careers.
- Click Retry … unsent above the applications list. The button shows how many emails failed, for example Retry 3 unsent.
This retries rejection and move-forward emails together. You see how many were sent, and how many still failed. If more than 300 failed, the first 300 are retried each time.
Open a résumé
- From the list: click the file name in the Resume column.
- From an application: click the file name under Resume.
The résumé opens in a new browser tab, where you can read or download it. Only members with Manage Job Applications can open résumés.