Manage time-off settings
This page shows you how to set up time off for your organization: the types of time off, who gets them, when people work and which days are holidays.
Members with the Manage Time Off permission. See Roles and permissions reference.
Open the time-off settings
- Go to Scheduling > Time Off.
- Click Manage time off.
The settings are on the Policies, Shifts, Holidays and Settings tabs. Members who can only approve requests don't see these tabs.
Create a time-off policy
A policy is a type of time off, such as vacation, sick leave or parental leave. Members request time off under a policy, and each policy has its own balance.
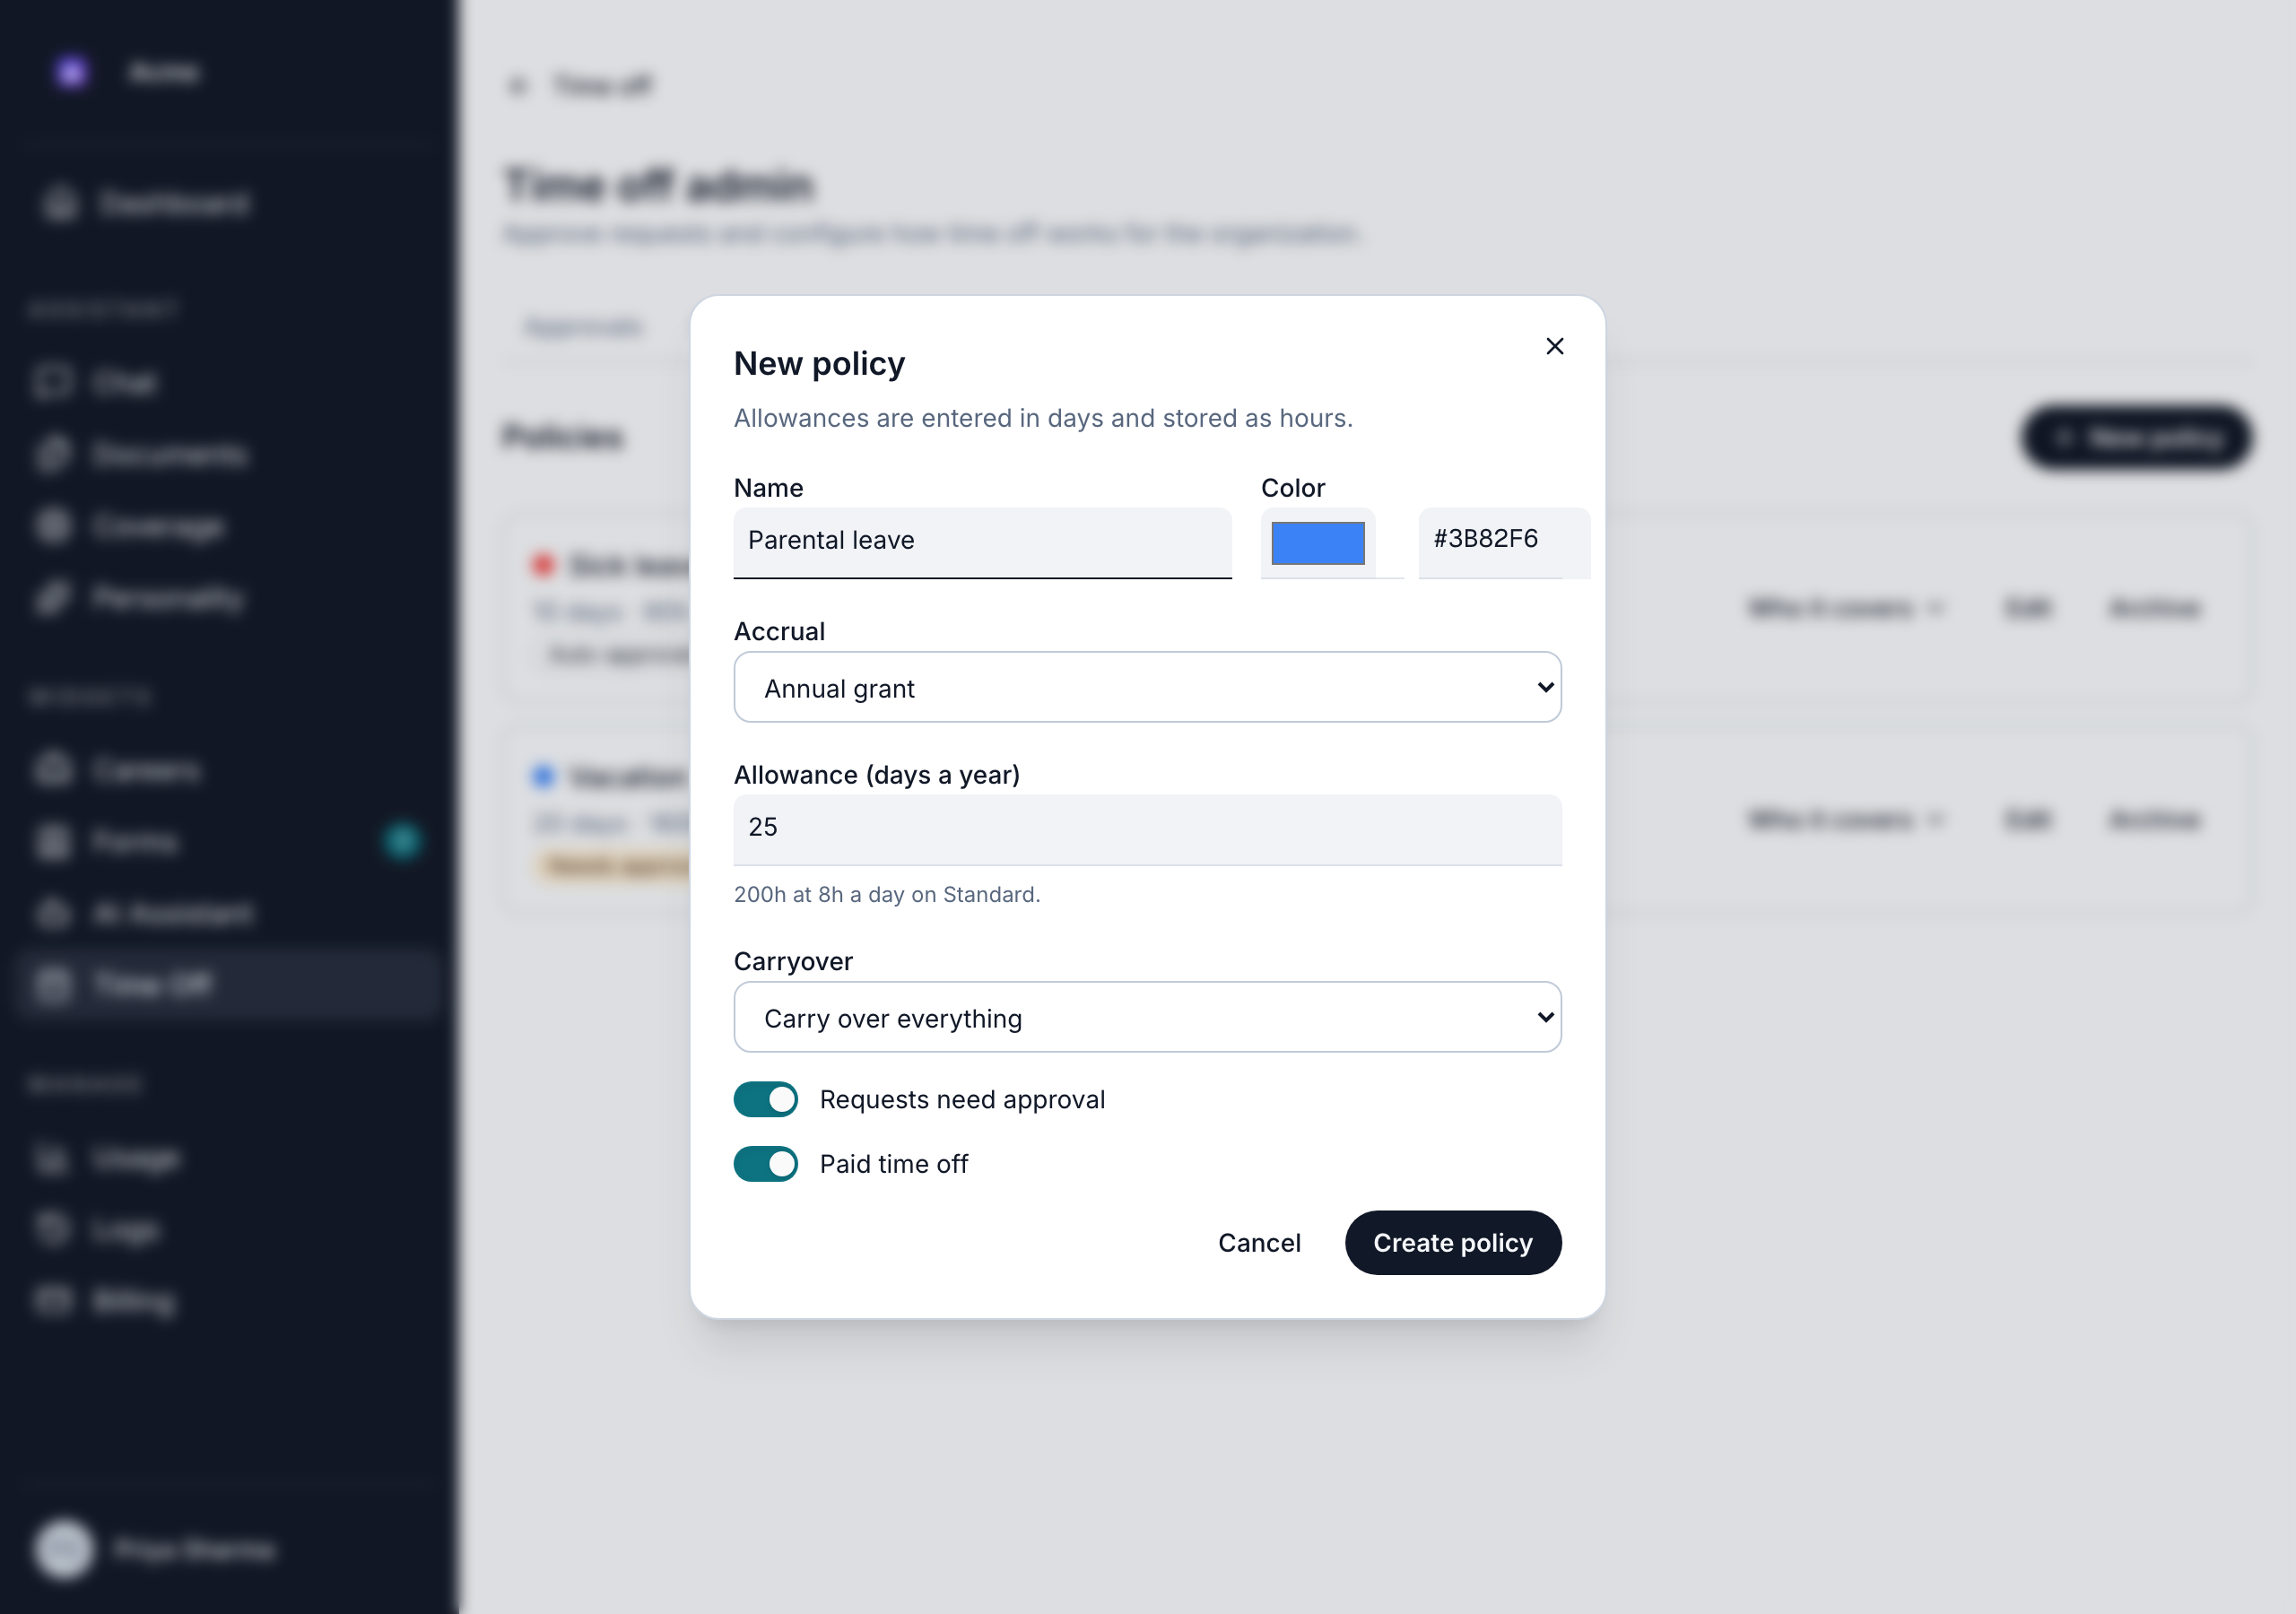
- On the Policies tab, click New policy.
- Enter a Name, up to 60 characters, and choose a Color for the calendar.
- Choose the Accrual:
- Annual grant: members get a set allowance each leave year. Enter the Allowance (days a year), for example
25. Allowances are entered in days and stored as hours, based on the length of a day on your default shift. - Unlimited: there's no allowance and no balance to track. Use it for time off you record but don't limit, such as sick leave in some organizations.
- Annual grant: members get a set allowance each leave year. Enter the Allowance (days a year), for example
- For an annual grant, choose the Carryover, which decides what happens to unused time at the end of the leave year:
- Carry over everything: all unused time moves into the next year.
- Carry over up to…: enter the maximum number of days that carry over. The rest expires. For example, with a cap of 5 days, a member with 8 days left keeps 5.
- Use it or lose it: unused time expires at the end of the year.
- Turn Requests need approval on or off. When it's off, requests under this policy are approved right away.
- Turn Paid time off on or off. This is shown on the policy as Paid or Unpaid.
- Click Create policy. You see "Policy created."
Your plan can limit how many active policies you have: 1 on the Free plan. At the limit, you see "You've reached your plan's limit of active time-off policies. Deactivate one or upgrade your plan to add another." Archive a policy to make room. See Plan limits.
Members who join partway through a leave year get a share of the allowance, based on how much of the year is left.
To change a policy, click Edit, make your changes and click Save policy.
Changing a policy's allowance doesn't change allowances already given for the current leave year. The new allowance applies from the next leave year, and to members who haven't been given this year's allowance yet. To correct a balance now, use Adjust on the Balances tab. See Approve requests.
Archive a policy
Click Archive on the policy, then Archive policy. Archived policies don't count toward your plan's limit. Nothing is deleted: existing requests, balances and history keep the policy's name. Members can no longer request time off under it. You can restore an archived policy later.
Assign policies to members
- On the Policies tab, click Who it covers on the policy.
- Choose who the policy applies to:
- Turn on Applies to everyone in the organization to include every member, including new members. You can then add members and turn on Excluded for anyone it shouldn't cover.
- Turn it off to include only the members you add.
- To add a member, choose them from Add a member… and click Add.
- For each member you add, you can set:
- Allowance (days): a different allowance for this member. Leave it empty to use the policy's allowance.
- Starts on (pro-rates a new hire's first year): the date the policy starts for them. Their first year's allowance is reduced to match.
- Ends on (set when they leave): the date the policy stops for them.
Changes save automatically. Click the "… members covered" button to see exactly who the policy covers, with each person's allowance.
To give new hires the same policies, shifts and token limit in one step, use a member preset. See Members.
Set working schedules (shifts)
Shifts decide which days and hours each member works. Bizbot only counts working time when someone requests time off, so a shift sets both which days count and how many hours a day is worth.
Every organization has a default shift, Standard. It runs Monday to Friday, 9:00 to 17:00, and new members are put on it automatically.
Adding shifts and setting members' weekly schedules are included in the Business and Enterprise plans. On the Free plan, you can still edit the Standard shift's hours, and everyone works its days. Shifts and schedules you set up on a higher plan keep working, but you can't change them. See Plan features.
Create a shift
- On the Shifts tab, click New shift.
- Enter a Name and choose a Color.
- Choose the shift's Time zone.
- Enter the times it Starts and Ends. Bizbot shows the length of the day. Overnight shifts aren't supported.
- Optionally, turn on Unpaid break and enter when the Break starts and how many Minutes it lasts. Break time isn't counted as time off.
- Click Create shift.
Click Edit to change a shift, or Archive to stop using it. The default shift can't be archived.
Set a member's weekly schedule
Below the shifts, each member has a weekly schedule.
- For each weekday, choose a shift or Not working.
- Choose the date the schedule is effective from.
- Click Save. You see "… 's week updated."
For example, someone who works Monday to Thursday has Not working on Friday. A request that includes a Friday doesn't use any of their balance for it.
Add holidays
Company holidays aren't counted when members request time off.
- On the Holidays tab, choose the Year.
- Click Add holiday, or Copy followed by last year to start from last year's holidays on the same dates.
- Enter a date and a Holiday name for each row. Click Add a row for more.
- Click Save holidays. You see "Holiday added." or "… holidays added."
Adding a holiday doesn't change requests that were already made. If requests already cover the new date, Bizbot warns you, and lists them on the Approvals tab. The members can cancel and request again to get the day back.
To remove a holiday, click its remove button and click Remove holiday. The day counts as a working day again for future requests.
Organization time-off settings
The Settings tab has these settings. Switches save as soon as you change them; for the others, click Save next to the setting.
- Allow self approval: when it's on, members who approve time off can approve or deny their own requests. When it's off (the default), someone else has to decide them.
- Allow negative balances: when it's on, members can request and be approved for more time off than they have left. When it's off (the default), an approval that would take a balance below zero is blocked with "That approval would take the member below zero, which this organization does not allow."
- Minimum notice: how many days ahead members should request time off. A request with less notice shows a warning, such as "This request gives less than 7 days of notice.", but isn't blocked, so the approver decides. Use 0 (the default) for no minimum.
- Leave year starts: the day and month each leave year starts, January 1 unless you change it. A leave year is the 12-month period that annual allowances cover: each member's allowance is given at its start, and unused time carries over or expires at its end. Changing the date moves when balances reset.